Adding Bleeds
What is a bleed?
Bleed is a printing term that is used to describe a document which has images or elements that touch the edge of the page.
If your file has color or design elements that touch the edge of the page, adding
bleeds and crop marks ensures even and clean borders.
By adding bleeds the product will look just as it does on your screen. If crops and
bleeds are not included, your product will end up with white borders or uneven borders.
Why do you need to add a bleed to your files?
After trimming, the bleed ensures that no unprinted edges occur in the final trimmed document. It is very difficult to print exactly to the edge of a sheet of paper/card, so to achieve this, it is necessary to print a slightly larger area than is needed and then trim the paper/card down to the required finished size.
Setting a bleed in Adobe InDesign and Illustrator
Creating a new document
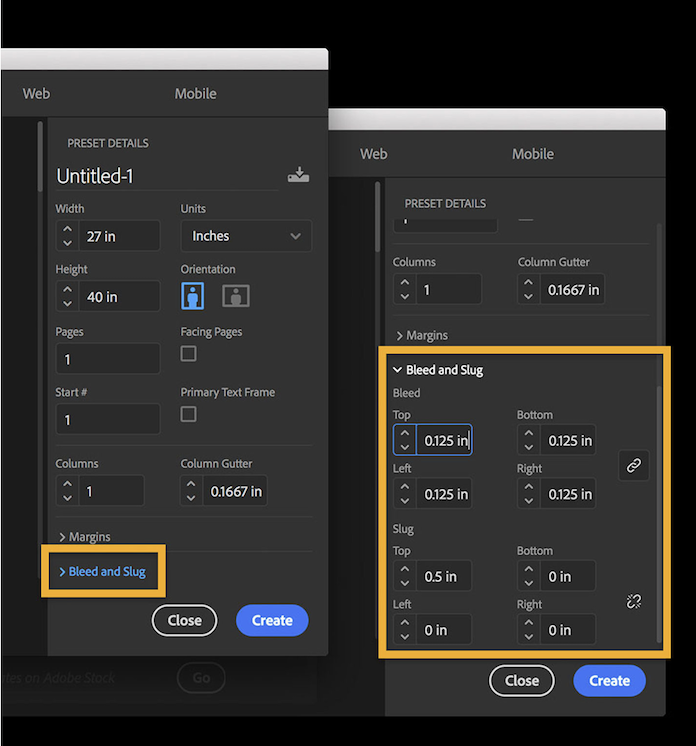
You can set bleeds when you create a new document. Go to file then new, select inches
as the unit measurement. Then scroll down to find the bleed section where you will
set all sides to .125". Your new document will have a red box outside your print area
where you will expand your graphics out to.

Adding to an existing document
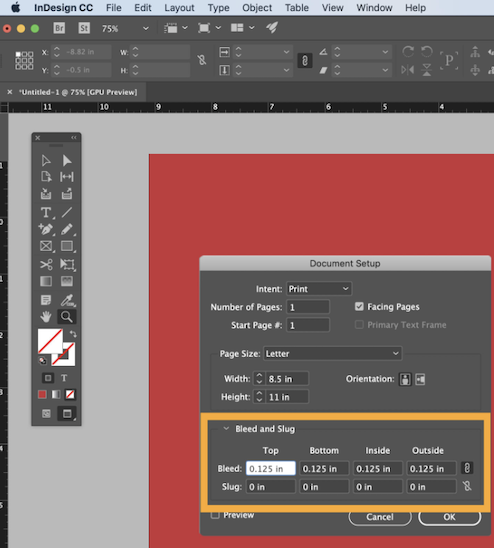
You can also set bleeds(.125" on each side) on an existing document by going to file,
document setup. This window will look slightly different in Illustrator but there
is a section to add bleed measurements here as well.

Setting a bleed in Microsoft Word
It is not recommended to use Microsoft word for projects which will need bleeds. There is not a way to set this easily and there is little control over color.
If you want to use Word for your project and it has a bleed, follow these steps:
- Open Word and create a new document. Next under the file menu choose page setup.
- Under paper size, choose manage custom sizes. We are going to be forcing the document size larger so that bleeds can be included in the layout.
- Click the plus (+) icon to add a new custom page size. The new size will be .25" wider on each size. So if you wanted an 8.5x11 document, you would set the size of your document to be 8.75x11.25". Click ok to confirm this and you are now ready to create your design.
What we have done is create a document that will have a final trim of 8.5×11″ with 1/8″ bleed on each side of the page.


